Baked Ziti

I LOVE Christmas!  I do!  I really do!  But I’m SOOOOOOOOOO tired of eating “Christmas food!”  It’s wonderful when it’s Christmas.  It’s even wonderful the day or two afterwards.  But I’m ready for some everyday food!

While fiddling around on Facebook a day or so after Christmas, someone mentioned spaghetti.  And I LOVE me some spaghetti.  But it hadn’t been that long since we’d had it.  So I wasn’t in the mood to fix that.  So I started thinking along those lines.  Spaghetti, Baked Spaghetti, Lasagna, Baked Ziti……… AHA!  That’s it!  Baked Ziti!  I hadn’t made it in ages!  So I decided that’s what we needed to have!

If you enjoy spaghetti and lasagna and such, you’ll love Baked Ziti!  It’s kind of a mix between the two really.  Very similar to both!  And a dish full of ooey, gooey goodness!!!!!!!

Let’s start out with what you’ll need:
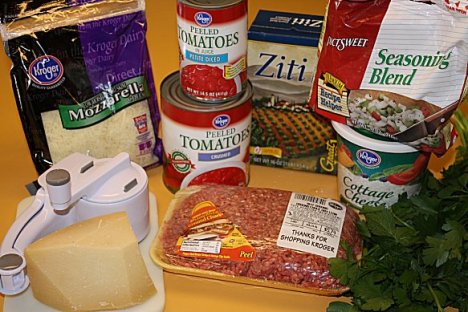
ziti-1

Ground chuck, fresh flat-leaf parsley, cottage cheese (I used fat-free), shredded mozzarella and fresh parmesan cheeses, a bag of seasoning blend (or chop your own if you’re not lazy like me!), ziti pasta, and canned tomatoes, both diced and crushed.
ziti-2a

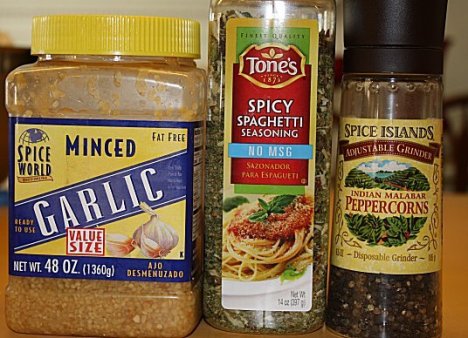
You’ll also need minced garlic, some Spicy Spaghetti Seasoning from Sam’s and some fresh-cracked pepper.
ziti-3

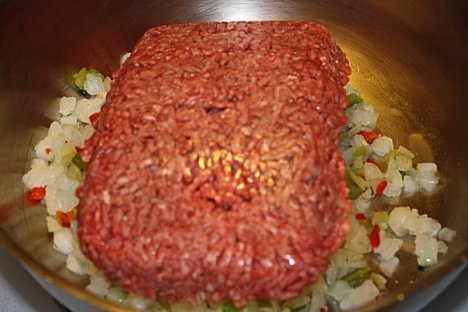
Start out by putting your ground chuck into a pan with the seasoning blend and browning it up.  When you start this, also put a large pot of water on to boil for your pasta.  Make sure to add some salt and a little oil to the water to keep your pasta from sticking together.
ziti-7

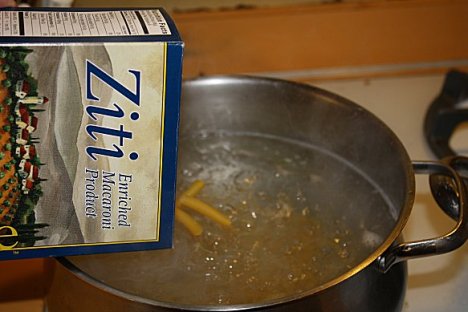
Once the water begins to boil, add the ziti to the water.  Boil the pasta about 7-8 minutes.  You don’t want to overcook the pasta because this is going into the oven to bake once it’s finished on the stove.  And overcooked pasta is mushy and gross!
ziti-4

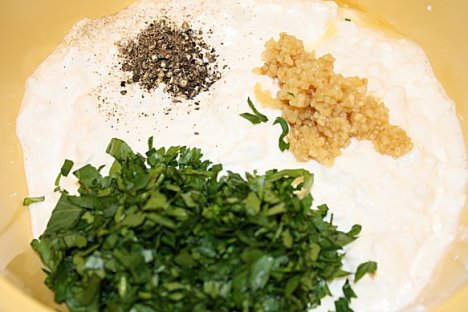
While the meat is browning and the pasta is boiling, start mixing up the cottage cheese mixture.  Pour the cottage cheese into a mixing bowl.  Add the garlic, fresh-cracked pepper and chopped parsley to the cottage cheese.
ziti-5

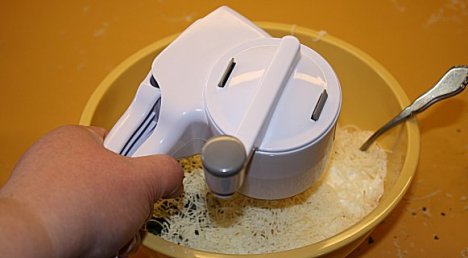
Next add the freshly grated parmesan cheese to the cottage cheese.
ziti-6

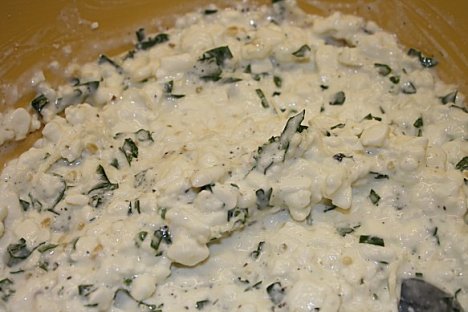
Mix it all up and set it aside until you’re ready to start assembling the casserole.
ziti-8

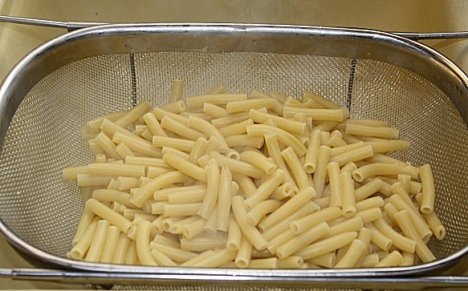
By now, your pasta should be ready.  Drain it and put it back into the pot you used to cook it……unless you REALLY love to wash dishes and want to dirty up another bowl to mix the pasta and cottage cheese together.  And if you DO happen to LOVE to wash dishes, would you please come live at my house?  I’ll feed you REALLY well!
ziti-9

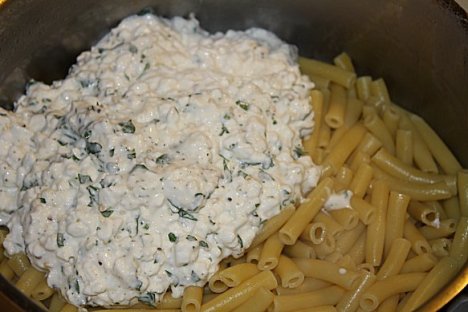
Mix the cottage cheese into the pasta.
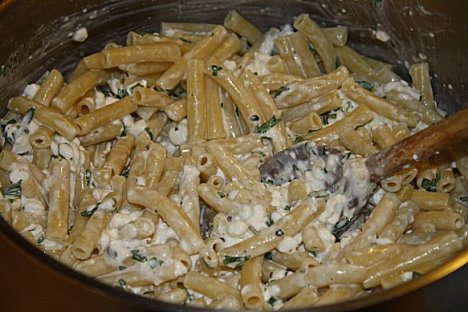
ziti-11

YUM!  It would be good just like this!  But wait!  We’re going to make it better!  WAY mo’ better!

ziti-10

Now that you’ve got the pasta and cottage cheese mixed up, drain the cooked beef and rinse it before returning it to the pan you used to cook it in.
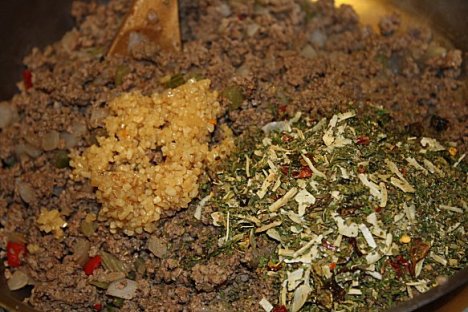
ziti-12

Add the garlic and spicy spaghetti seasoning to the meat.
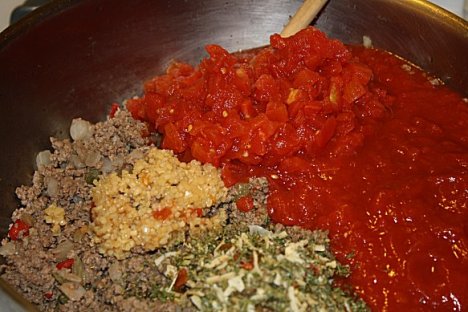
ziti-13

Now add the tomatoes and stir it all up.
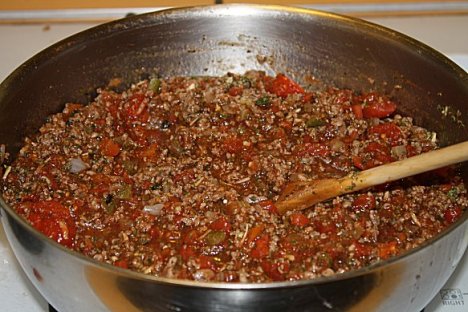
ziti-14

Oh my gravy!  Would you look at that!?!??!?!  Just let the meat simmer a few minutes and it will make your house smell something akin to Heaven!
ziti-15

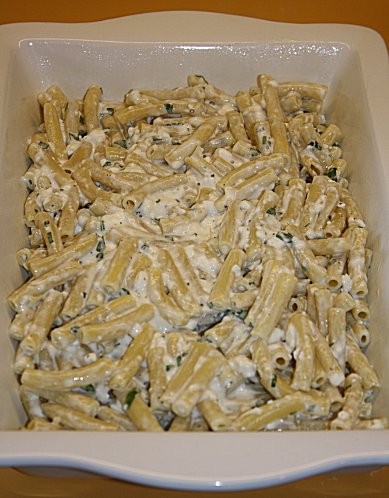
While the meat sauce is simmering, pour the pasta into a baking dish sprayed with non-stick cooking spray.
ziti-16

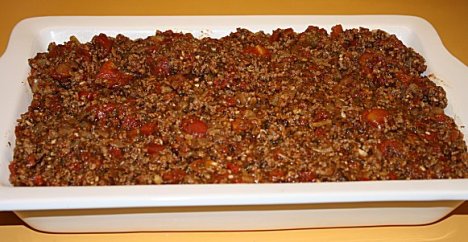
Now top the pasta with the meat sauce.
ziti-17

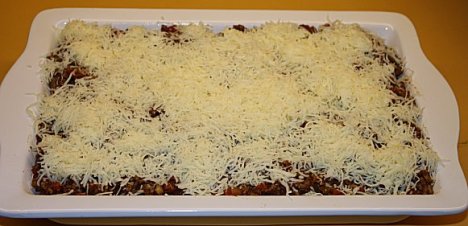
Sprinkle the shredded mozzarella cheese on top before baking.
ziti-18

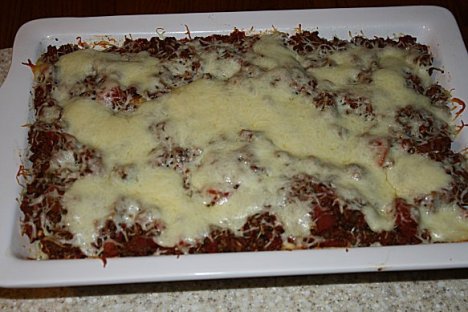
And when the oven finishes with your glorious little dish, this is what you get!
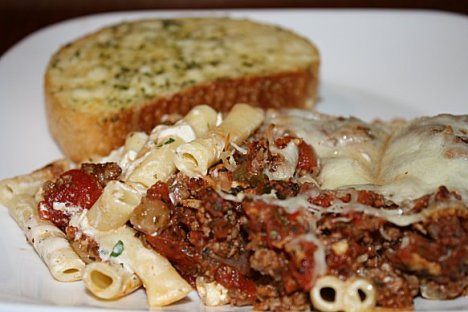
ziti-19

So let’s eat!  YUMMMMMMMMMM! 

This is just good, honest food!  Nothing fancy.  Nothing pretentious!  Just good.  It feeds the tummy and it feeds the heart and soul! 

Baked Ziti

*  1 1/2 -2 pounds ground chuck

*  1 bag seasoning blend

*  1-28 oz. can crushed tomatoes

*  1-15 0z. can petite diced tomatoes

*  1 lg. tub cottage cheese

*  1-8 oz. bag shredded mozzarella cheese

*  1 cup freshly grated parmesan cheese

*  1 handful fresh parsley, chopped

*  2 Tbsp. garlic, minced (divided)

* 3 Tbsp. Spicy Spaghetti Seasoning

*  1 Tbsp. pepper, fresh-cracked

Brown ground chuck with seasoning blend.  Drain and rinse meat once it is browned.  Once the meat is drained, add it back to the pan you cooked it in.  Add 1 Tbsp. garlic and spicy spaghetti seasoning to it.  Now add the tomatoes and stir.  Simmer the meat sauce 20 minutes.

Boil pasta and drain.  Mix cottage cheese with remaining garlic, parsley and black pepper to taste.  If you like more parsley, use more.  If you like just a little, by all means, use some dried instead of buying a whole big bunch of fresh.  Once you have all the spices mixed into the cottage cheese, mix it with the drained pasta.

Before you start assembling the casserole, make sure to spray your baking dish with non-stick spray.  Start by adding the pasta to the bottom of the dish.  Top with the meat sauce and finish by sprinkling with mozzarella cheese.

Bake in a pre-heated 350° oven approximately 20 minutes or until the cheese is melted and the casserole is bubbly.  Serve hot.

I kept it very simple with this meal.  We’ve eaten so many huge meals over the last few days due to the holidays that I served it with just garlic bread.  But you could certainly add a salad and have a very nice “company” meal. 

However you dish it up, serve it with love!  Enjoy!

Monte Cristo Strata

Christmas is literally just hours away now!  It’s wicked cold here in TN.  We woke up to a nippy 11° this morning with a wind chill of -2°.  That’s just insane for us here in the South!  But as the old saying goes, if you don’t like the weather here, wait a minute…….we’re supposed to be back up to nearly 60° for Christmas day!  Again……INSANE!  Not that the weather has ANYTHING to do with today’s recipe!  I just wanted to complain about the cold a minute!  Thanks for indulging me.

So I thought I’d share another good breakfast/brunch idea with you this morning.  I really enjoy breakfast casseroles.  This casserole is a “strata.”  It’s similar to a quiche in that it has lots of eggs and is baked.  And for those who aren’t that big a fan of eggs ***raising hand*** this is a good alternative to plain old scrambled eggs.  There’s so much other action that the eggs are mostly camouflaged.  Which to me, is a good thing!  I’m not a huge fan of eggs for the most part.

Let’s build this thing, shall we?  It’s not going to build and cook itself! 

Here’s what you’ll need to get started:

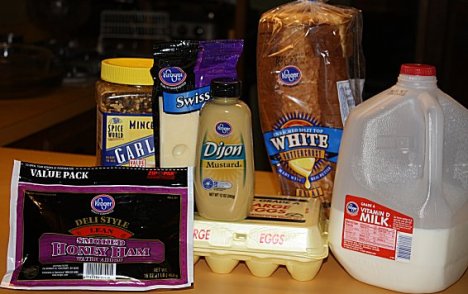
strata-1

Bread of choice, sliced ham, eggs, milk, Dijon mustard, minced garlic and sliced Swiss cheese.  Other ingredients could include:  onions, red and/or green bell peppers, roasted red peppers, smoked turkey and pepper jack cheese.  You could really turn this into anything you wanted it to be by changing up the ingredients.

strata-21

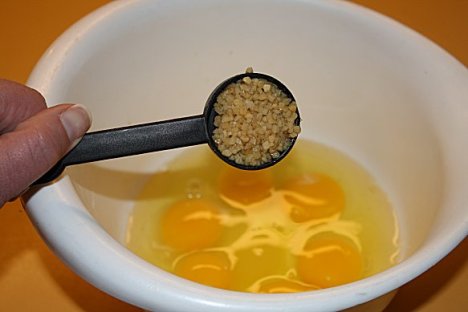
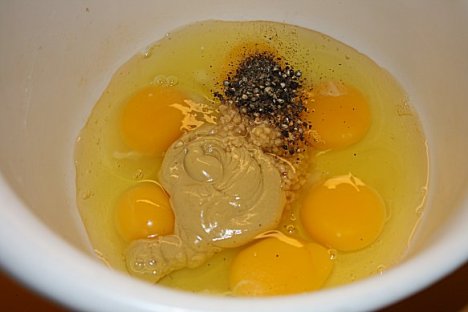
Break 4-6 eggs in a bowl.  If you’re making a large pan (9″x13″, I would  recommend you use 6 eggs.  If you’re using a small baking dish, 4 will be fine.)

strata-3

Add a Tablespoon of minced garlic to the eggs.  If you really like garlic, add more.  If you’re a vampire and garlic offends you, just leave it out.  Add salt and pepper to taste.  I never add salt because the ham and cheese make it plenty salty for me.  But if you don’t suffer from hypertension like me, by all means, add some salt.  And as y’all know, I prefer fresh cracked pepper, so that’s what I’ll add.  You could also add some minced dried onion, crushed red pepper, smoky paprika, or any other spice or herb that cranks your tractor. 

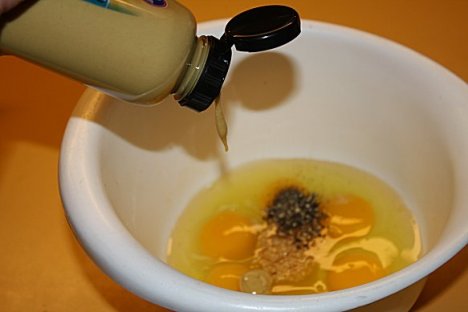
strata-5

Now add a healthy squirt of Dijon mustard.  Y’all forgive me for not turning the bottle of mustard around in the photo so it could be read.  I’m still trying to get the hang of this food photography thing!  What’s a healthy squirt, you ask?  Um, well, I don’t know.  I like it where I can actually TASTE the mustard.  So if I had to venture a guess, I’d say at least 1/4 cup.  But that is strictly a guesstimate on my part.

strata-6

There’s my “healthy” squirt of mustard and my very healthy dose of freshly cracked pepper.  Now here’s a little secret…..when y’all weren’t looking (translation:  when I decided to dump it in and forgot to take pictures) I added some crushed red pepper flakes and dried minced onion.  I just thought the pepper looked awfully lonely and needed some of its friends from the spice cabinet. 

strata-7

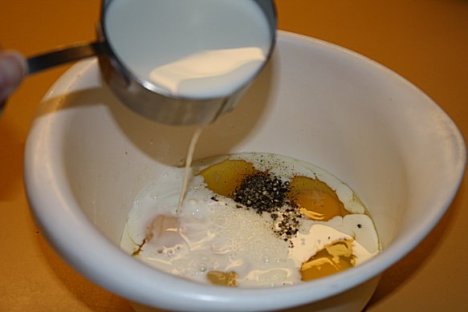
Add a cup of milk……or heavy whipping cream if you’re not fat like me or half and half or evaporated milk.  Any of those will work nicely. 

strata-8

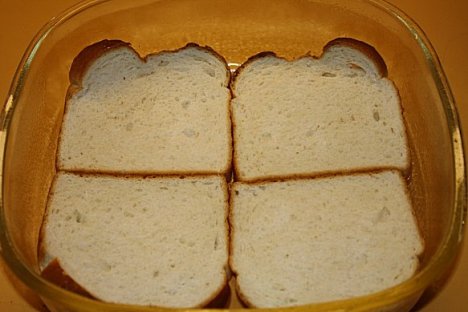
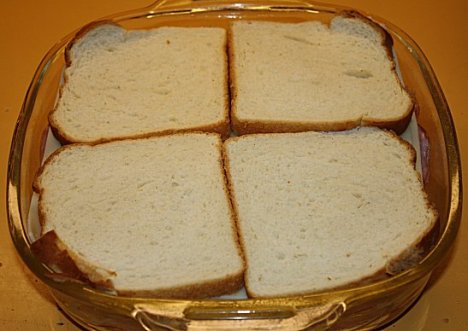
Before you lay the bread in the bottom of the dish, don’t foget to spray it with non-stick cooking spray.  If you don’t, you’ll still be scrubbing your baking dish at Valentine’s day.  Once you’ve given it a good spray, lay the bread in a single layer in the bottom of the dish.

strata-9

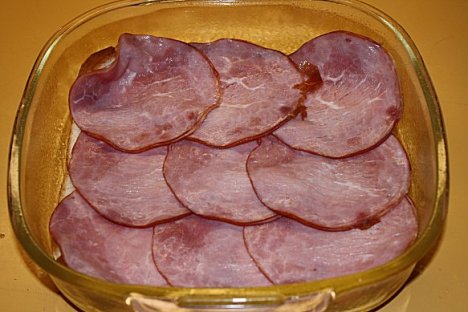
Add a layer of sliced ham on top of the bread.  Really layer it on!  It’s Christmas!  No need to be stingy!  You can do Weight Watchers with me in a couple weeks!  For now, put the pig in the pan!  It’s all good!

strata-10

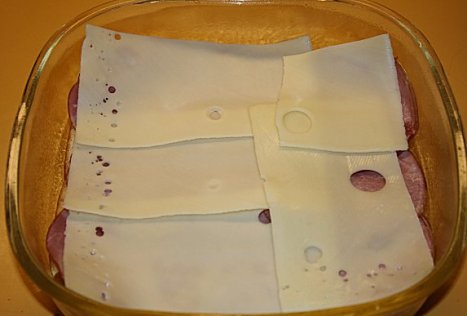
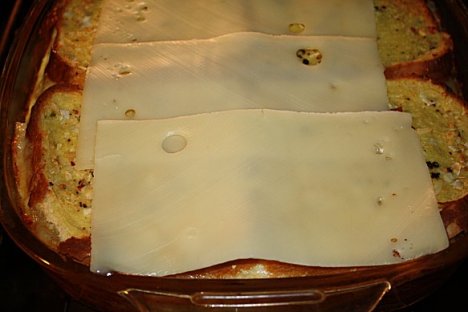
Top the ham layer with Swiss cheese.  Again, be generous.  If you prefer another cheese to Swiss, it won’t hurt my feelings or the ham’s if you add it instead of Swiss!  A nice sharp cheddar would be equally good. 

strata-11

Keep repeating layers until you get to the top of your dish.  End with a layer of bread.

strata-12

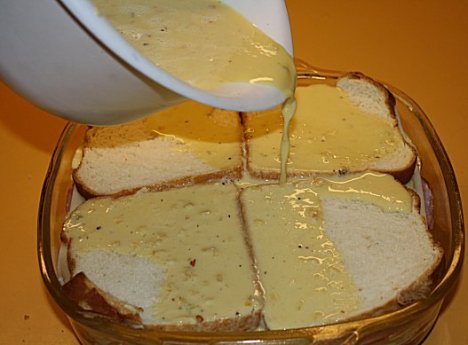
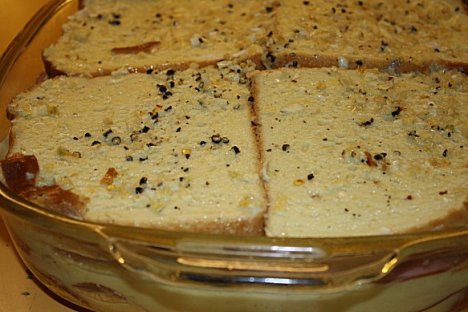
Whisk the egg/milk/spice mixture well and then pour over the bread.  Make sure the top layer gets completely saturated.  You don’t want any dry places.  It makes it hard and crunchy.

strata-13

It’s ready for the oven now!  Cover the dish with foil.  Put in a pre-heated 350° oven.  Bake for 25-30 minutes covered.  Take the foil off and bake an additional 25-30 minutes uncovered to brown up the top.  The key is making sure it’s “set.”  If you see any loose egg, bake it another few minutes.  You don’t want to serve the family raw eggs for Christmas breakfast. 

strata-14

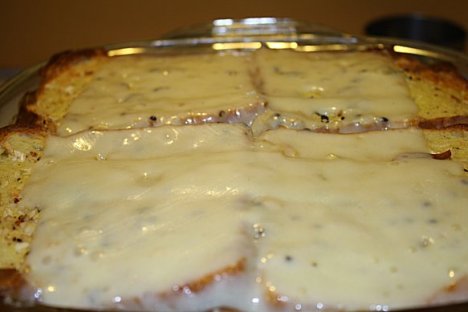
Top with remaining cheese and put it back in the oven just long enough to melt the cheese.

strata-15

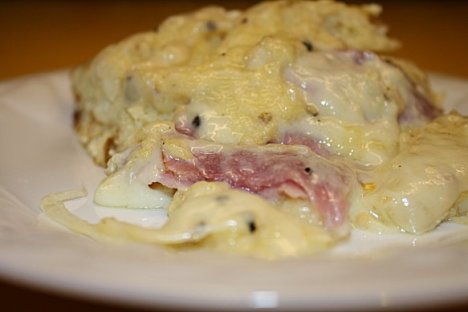
And in about 2 minutes, this is what you’ll have!  Ooey gooey cheesey goodness in a dish!  ***eyes rolling back in the head*** 

strata-16

Just look at all that melty cheese. 

Monte Cristo Strata

*  Sliced bread

*  4-6 eggs, beaten

*  1 cup milk

*  1 Tbsp. minced garlic

*  salt and pepper to taste

*  Dijon mustard, to taste

*  16 0z. pkg. sliced deli ham

*  2 pkg. sliced Swiss cheese

Mix eggs, milk, mustard and spices together.  Layer bread, ham and cheese in baking dish.  Pour eggs over the top.  Cover dish with foil.  Bake in a pre-heated 350° oven for 25-30 minutes.  Take foil off and bake an additional 25-30 minutes or until eggs are completely set.  Top with remaining cheese and return to oven about 2 minutes or until cheese melts.  Serve hot.

I’d like thank my friend Jenny in Colorado for the original recipe for this.  I’ve tweaked and tinkered with it over the years.  But the original recipe belongs to Jenny. 

This dish would be a fabulous one-hit wonder for Christmas morning.  Or it would be great with a pile of fruit beside it or even some of yesterday’s Sausage Hashbrown Casserole.  However you serve it, I hope you and your family enjoy it!

Merry Christmas!

Sausage Hashbrown Casserole

So Christmas is nearly here!  Just a few days to go now!  Today, I’d like to share a Christmas tradition with you…….my family and I get up before the crack of dawn on Christmas morning to open gifts.  When I say before the crack of dawn, I mean before the very butt-crack of dawn!  It’s EARLY!  Like, um, 3:00AM……… IF I can keep the Tall Skinny Man in the bed and NOT waking up the Ankle Biters before that!  So we get up and we unwrap gifts and enjoy a little time looking at what we all got.  Then we get up and start breakfast.  A HUGE  breakfast has been our Christmas tradition for my entire life.  It’s just changed a bit over the years.

Christmas doesn’t “look” like it used to for us.  We used to get up that early, then go to my Moma’s house by 5 AM to do Christmas there.  Then we were at my Granny’s by 7 AM to eat breakfast at her house.  You can’t even wrap your head around all the food she would have for breakfast!  She made all the biscuits homemade……probably 10 dozen of them!  No joke!  Then it was to my Daddy’s house by 9 AM for Christmas there.  On to my Pa John’s (my Daddy’s Daddy) for Christmas there with him and my Daddy’s brother and sisters and their families.  We ate a big lunch there before proceeding BACK to my Granny’s to have Christmas supper there with all of my Moma’s brothers and sisters and their families.  It was a joy! 

Most of those folks have gone home to be with the Lord now.  So it’s just my brother and me for Christmas.  And we get up and cook this insanely huge breakfast for just the 7 of us!  Hopefully this year, we’ll have 8 with my nephew’s sweet little girlfriend.  But it’s just 8 people and we have this ginormous spread of food!  But our ginormous doesn’t hold a candle to the size of the breakfast at our Granny’s from years gone by.  But Unk sure can come awfully close to Granny’s homemade biscuits! 

My nephew is a picky, picky, PICKY eater.  But he LOVES the casserole I’m going to share with you today.  It’s a recipe my Aunt Ann, my mom’s baby sister shared with me several years ago.  I’ve tweaked it and made it my own over the years.  And it’s something that our “new” Christmas breakfast wouldn’t be complete without.

So let’s get started.  Here’s what you’ll need:

hashbrown-cass-1

Frozen Hashbrowns (shredded or cubed worked equally well), Frozen Seasoning Blend (a mixture of chopped onions, bell peppers and celery), sage, black pepper, cream of mushroom soup, garlic, milk, sharp cheddar cheese and sausage (I prefer to use the one with sage or the hot, but it’s up to you which one you and your family prefer.)

hashbrown-cass-2

Start with the hashbrowns in a large bowl.  You’ll need one big enough to be able to stir it all up! 

hashbrown-cass-3 

Next, brown the sausage in a skillet.

hashbrown-cass-10

Break it up as you brown it so the pieces will be fairly small and not in large chunks.

hashbrown-cass-4

Back to the hashbrowns, add the bag of seasoning blend to the potatoes.

hashbrown-cass-5

Add the sage to the potato mixture.  If you have fresh sage, it’s preferred, but right now, all my fresh herbs are freshly DEAD.  So I had to use dried sage.

hashbrown-cass-6

Next add fresh cracked pepper.  If you don’t have a pepper grinder, you can use plain old pepper from your pepper shaker.  I just happen to prefer freshly cracked peppercorns.

hashbrown-cass-7 

Now add minced garlic.  I really prefer the fresh for this too, but this time of year, my garlic seems to go bad as quickly as I bring it home from the friendly neighborhood Kroger.  So it’s just easier to buy a big bucket of already minced from Sam’s.  Whatever works, huh?

hashbrown-cass-8

Add a can of cream of mushroom soup.  Now if you’re opposed to mushrooms or allergic or whatever, cream of “whatever” soup will work just fine here.  Personally, I LOATHE fungal units.  But they’re so tiny in this, I can tolerate it.  But cream of celery or potato would be just as good!   Once you dump the soup in, fill the can with milk and swish around in the can to loosen the remainder of the soup.  Now pour it into the bowl.

hashbrown-cass-9

Add the shredded cheese.

hashbrown-cass-11 

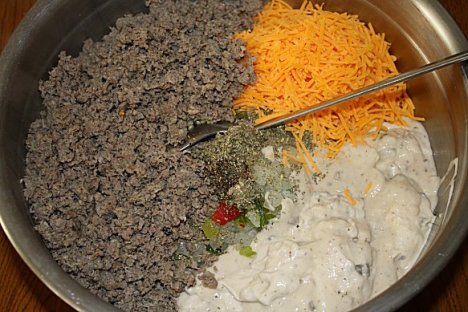
 Now add the drained sausage to the bowl.  You’re ready to mix it all up.

hashbrown-cass-12

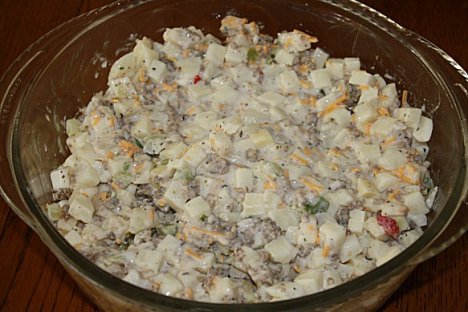
All mixed up and ready to go into the baking dish.

hashbrown-cass-13

Be sure to spray your baking dish with non-stick spray!  You’ll be glad you did later!  Now add the casserole into your pan of choice.  Bake it for 45 minutes in a pre-heated 350° oven.

hashbrown-cass-14

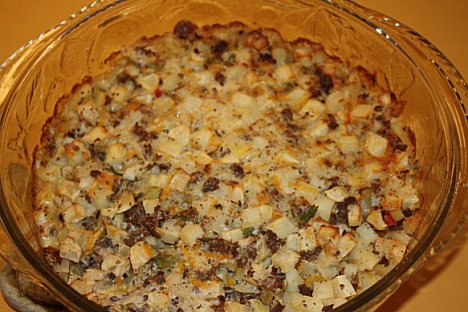
And when it’s finished in the oven, this is what you’ll have.

hashbrown-cass-15

And now you’re ready to eat!  YUMMMMMMM!  This goes great alongside a quiche or waffles or biscuits and gravy or just by itself! 

Sausage Hashbrown Casserole

*  1 large bag frozen hashbrowns

*  1 bag frozen seasoning blend

*  1 can cream of celery soup

*  1 can milk

*  1-8 oz. bag shredded sharp cheddar cheese

*  Garlic, sage and black pepper to taste

*  salt, to taste

*  1 pound sausage, browned and drained

Open hashbrowns and seasoning blend and pour into a large mixing bowl.  Add spices, soup, milk and cheese.  Brown sausage and break up into small pieces.  Drain well.  Add to potato mixture.  Stir until well combined.  Spray a baking dish with non-stick cooking spray.  Bake in a pre-heated 350° oven for 45 minutes.  Serve hot.

And that’s a part of our Christmas morning breakfast tradition!  I wanted to share a little of our tradition with you and yours!  I hope the next few days of Christmas preparation are full of fun and joy and the magic we all love at this time of year!  Merry Christmas!

Ankle Biter Snack Mix

You know what?  Ankle Biters can cook too!  Well, I guess I use the word “cook” loosely.  Because today’s fare didn’t really involve any cooking on their part.  But the point is, you don’t have to be a grown up to make something delicious! 

For several years now, I’ve been getting each of the Ankle Biters a cookbook for Christmas.  They have absolutely LOVED having their own cookbooks!  They really enjoy getting into the kitchen with their old mom.  But they truly have no idea just how much joy it brings her!  When I’m old and gray, or well, oldER and grayER, I will count the memories we made together in the kitchen among my sweetest and most precious.  There’s honestly very little in this life that I enjoy more than having my boy babies in the kitchen with me cooking alongside me.  It gives me such intense joy!

We make this fairly frequently.  The original recipe came from one of the boys’ cookbooks.  We’ve made it so many times that it changes with our mood everytime we make it.  There’s not a “right” or “wrong” way to do this. 

Now y’all have heard me say “this ain’t rocket science” before.  Well, this is SOOOOOOOOOO not rocket science.  There’s no real recipe.  Toss in whatever YOU like.  We’ll work through making it and then I’ll give you a basic recipe  for you to start with, but then you can make it your own by adding things you and your ankle biters like.

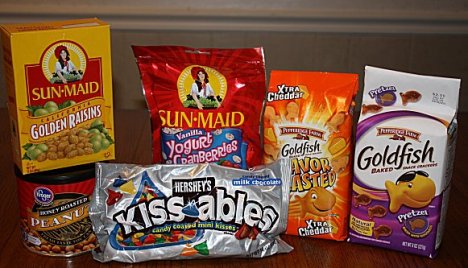
Here’s what you need to get started:

snack-mix-1

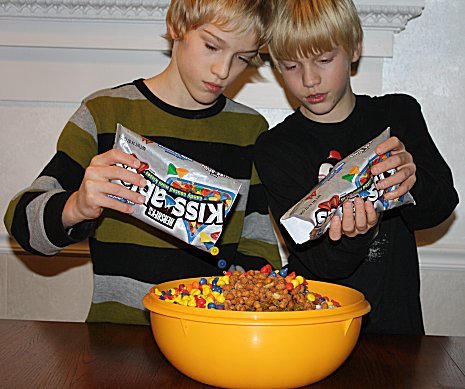
Here are the Ankle Biters ready with their HUGE bowl:

snack-mix-2

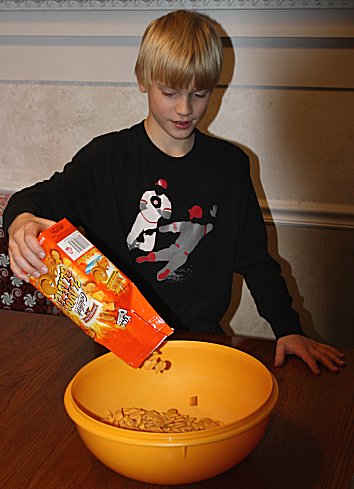
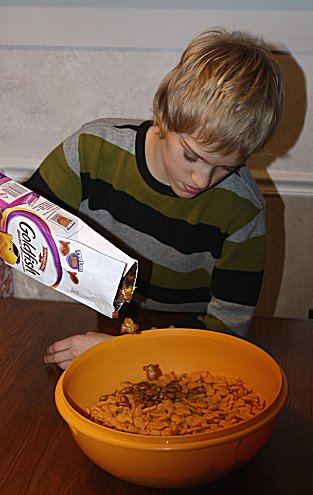
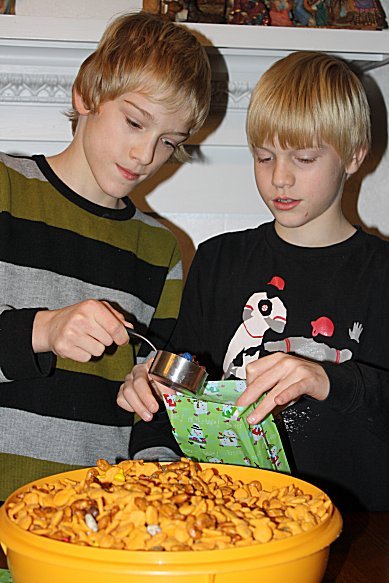
Ankle Biter #2 starting by pouring in the fishy-shaped cheese crackers:

snack-mix-3

And Ankle Biter #1 adding the fishy-shaped pretzels:

snack-mix-4

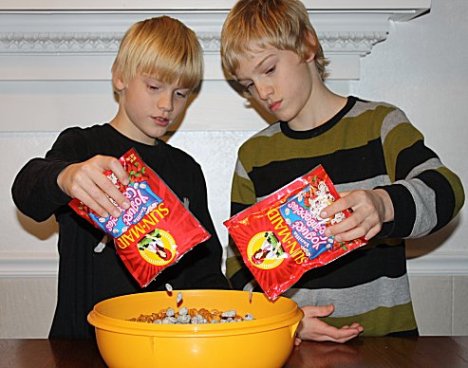
Adding the vanilla yogurt-covered cranberries requires teamwork!  It’s a two-man job!

snack-mix-5

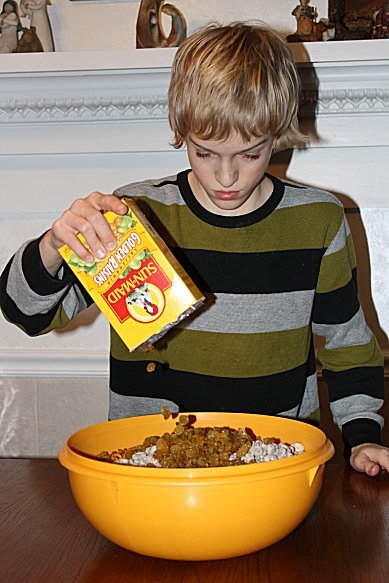
Ankle Biter #1 adding the golden raisins:

snack-mix-6a

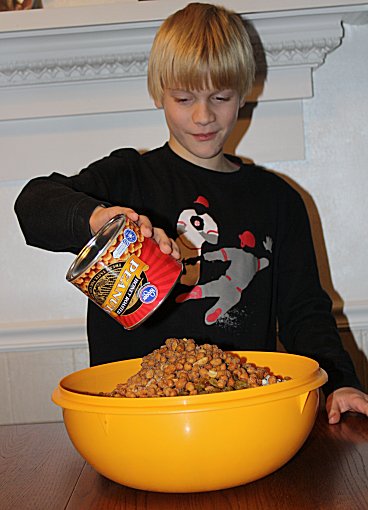
Ankle Biter #2 adding the honey-roasted peanuts:

snack-mix-7

Adding the chocolate………

snack-mix-8a

Now it’s ready to be stirred up……..

snack-mix-9

Ankle Biter #1 giving it a mix and giggling about it……..

snack-mix-10

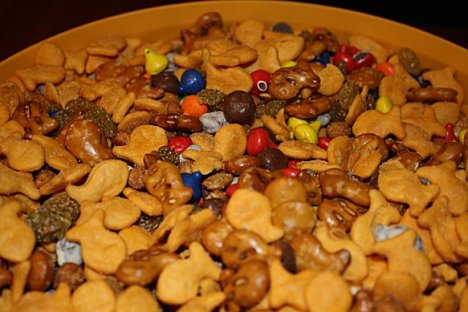
All mixed up and ready  to package:

snack-mix-11

Packaging up the goodies:

snack-mix-12a

Ankle Biter #2 with the finished product, ready to share:

snack-mix-13

Ankle Biter Snack Mix

*  1 box golden raisins

*  4 bags fish-shaped crackers

* 2 bags fish-shaped pretzels

*  2 bags Hershey’s candy-coated Kisses

*  2 bags vanilla yogurt-covered dried cranberries

* 1 container honey-roasted peanuts

Dump all into a large bowl and mix until well-combined.  Store in an airtight container. 

We made these to give away in little Christmas goodie bags.  It’s always more fun to make something if you know you’re going to get to share it.  So since we had a “snow” day today……..um, lotsa cold, cold rain, but no actual “inclement weather” for which the Ankle Biters got out of school today……..we decided to make these little tasties to share with friends and family. 

The Ankle Biters hope you enjoy their recipe and that you’ll make it with your own ankle-biting people.  They would also like to wish you all a very Merry Christmas!

boys-cmas-08

Christmas Angels

Howdy friends and neighbors!  My apologies for leaving you high and dry for days on end.  This past week has been the culmination of a HUGE project for me at work.  Once a year (actually twice for us this year because we had one in January too!) we have people come in from all across the state to examine the manner in which we (my state’s Department of Children’s Services) provide services to the children and families in our region.  That’s the best way I know how to describe it in layman’s terms.  When people ask me what I do, I tell them unless they do what I do, they won’t understand what I do.  LOL  It’s called a Quality Service Review or QSR for short.  I am my region’s Quality Service Review Coordinator.  So the past six weeks have been spent planning and then executing this past week’s QSR.  It’s a monumental undertaking to host approximately 40-50 people for an entire week.  So that’s why I’ve been scarce around here.  And again, my apologies for just leaving you with no new recipes.

So without further ado, let’s talk about a new Christmas “goodie!” 

Several years ago, I discovered this little Angel cookie.  It’s so versatile!  The original recipe calls for pecans and chocolate chips.  But for those of you who know me and know me well……….I can’t ever leave “well enough” alone.  It’s just not written in my genetic code anywhere!  Can’t.do.it.  So I’ve played around with this recipe over the years and made it my own.

The ones we’re going to make today are going to be cinnamon and pecan instead of chocolate and pecan.  I’ve done this with white chocolate chips and macadamia nuts.  I’ve also used peanut butter chips and peanuts.  Another favorite is chocolate chips and hazelnuts.  There are so many combinations that would be marvelous to try!

I happen to be a HUGE fan of anything cinnamon!  So I gave it a whirl years ago with cinnamon chips.  If you’ve never seen them before, they look just like chocolate chips, except they’re cinnamon-y.  Every store around here stopped carrying them after I started making them with cinnamon chips so my friend Lisa in Maine shipped me a ginormous box of them to put in the freezer.  I hope YOUR local stores carry them or that you have a Lisa-friend in Maine who can ship you some!   Because they really are amazing with the cinnamon chips!

At any rate, let’s make some!  These are so simple, it’s ridiculous!  Truly, a child could make them! 

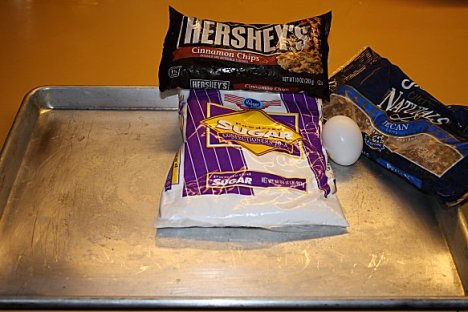
Here’s what you’ll need:

angels-1

Christmas Angels

*  1 egg white

*  1 cup chopped pecans

*  1 cup cinnamon chips

*  1 cup powdererd sugar

Pre-heat oven to 350°.  Line cookie sheets with parchment paper.  This is one instance where I do NOT recommend using a Pampered Chef stone.  These really do best when they’re baked on parchment paper on a regular cookie sheet. 

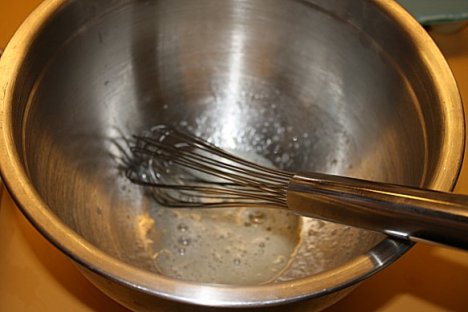
Beat egg white until frothy like this:

angels-2

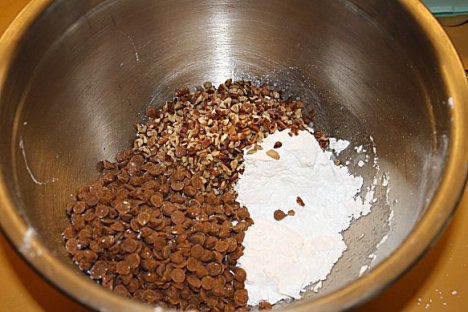
Add pecans, powdered sugar and cinnamon chips to frothy egg white:

angels-3

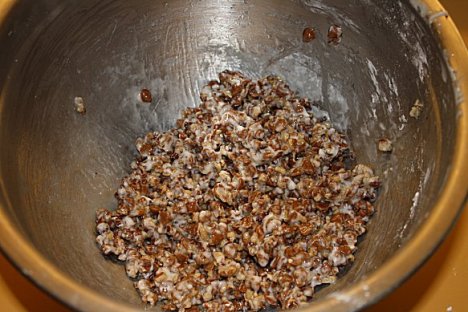
Stir together until well combined:

angels-4

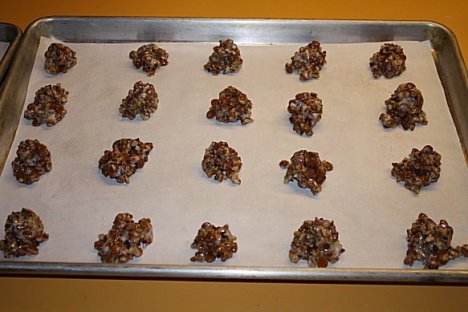
Drop by teaspoonfuls on baking sheet:

angels-7

You’ll end up with close to 3 dozen from one batch. 

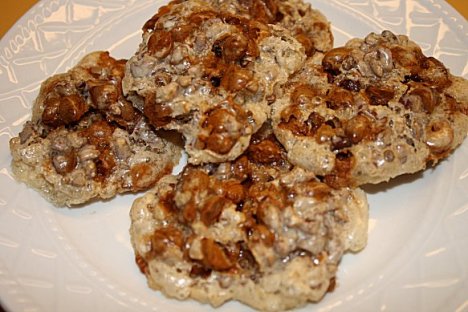
Bake them for 11-12 minutes and you’ll end up with these:

angels-6

Yum!!!!!!!  We’ve already eaten one or twelve each this afternoon!  They’re absolutely delightful!  I hope you enjoy them!  Give them your own spin and tell me what combination you come up with!

Merry Christmas!  Now get in that kitchen and make some holiday memories with the folks you love the most!

Chocolate Peppermint Sandwich Cookies

Let’s do some more Christmas baking!  I’ve been busy this weekend preparing for a HUGE event at work this week.  I’ve baked and baked and baked for this thing! 

I tried out something sorta new as an experiment.  I took an old cookie recipe and altered it and then kicked it up a notch by making it a sandwich cookie.  It’s like an oreo, but on steroids! 

Several years ago, I bought this little cookie cookbook at Sam’s for little to nothing.  It has THE BEST cookie recipes in it EVER!  I have more than gotten my money’s worth out of that book! 

So I took one of my favorite recipes from that book and made it into these Chocolate Peppermint Sandwich Cookies I want to share with you.

Wanna make some cookies?

Chocolate Peppermint Sandwich Cookies

*  2 sticks butter (room temperature)

*  1/2 cup white sugar

*  3/4 cup brown sugar

*  1/4 cup white Karo syrup

*  1/2 cup cocoa

*  1 egg

*  2 tsp. vanilla

*  2 1/2 cups self-rising flour

Cream butter and sugars together until smooth.  Add Karo syrup and beat again until well combined.  Add egg and beat.  Add dry ingredients and beat until combined.  Add vanilla. 

In order to get a really pretty round cookie, I recommend using a small scoop to drop the dough.  Cover cookie sheets with parchment paper before dropping dough.  Slightly flatten each scoop of dough with the palm of your hand.  Bake in a preheated 350° oven for 9-11 minutes.  Cookies will still be very soft.  Don’t overbake them because they seem so soft.  They will firm up when they cool.

Cool cookies completely.

Peppermint Filling

*  2 sticks butter (room temperature)

*  2 pounds powdered sugar

*  2-3 Tbsp. milk

*  1 cup crushed peppermints, divided

*  2 tsp. peppermint extract

Crush peppermints in food processor.  Crush them as tiny as possible.  I recommend using a soft peppermint for this instead of candy cane-type peppermint.  Cream butter and sugar together.  Add milk gradually until frosting is spreading consistency.  Add extract and 1/2 cup crushed peppermints. 

Spread on the bottom of one cookie and top with another.  Make sure a little frosting squeezes out the edges so the peppermints have something to adhere to.  Roll the edges of each cookie in the remaining crushed peppermints.

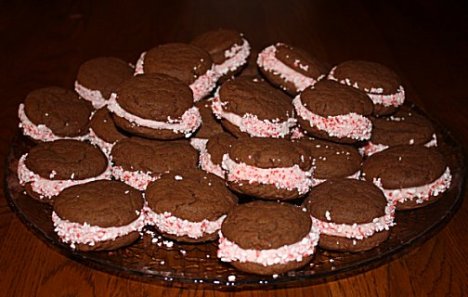
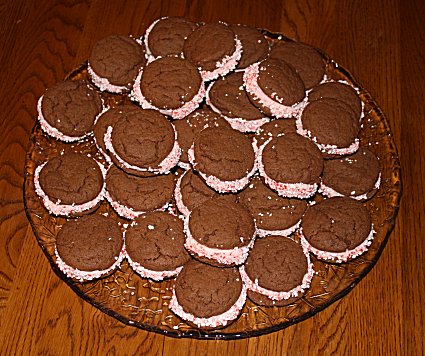
And this is what you end up with:

peppermint-cookies-1


peppermint-cookies-2

And there ya go!  They were fairly simple to make and OHHHHH so pretty!  They look like you put an awful lot of effort into them, but not so much! 

Enjoy!!!!

Chinese Chewies

Chinese Chewies?  A Christmas goodie, you ask?  OH YEAH, BABY!  This is a Granny recipe.  My Granny was unbelievably amazing!  Her mother died a few days after giving birth to her.  Her father died not too long thereafter.  And my Granny was raised in an orphanage in Nashville where Tenneessee State University stands now.  She married young and raised 6 kids while working full time at Brown Shoe Company.  And she could cook like nobody’s business! 

She made Chinese Chewies all the time!  This is actually the first recipe she ever “turned me loose” on.  I was about 7.  She took down her recipe box, set this recipe in front of me and said, “Get to it, little lady.”  That’s how simple they are!  A 7-year old can make them!

I have no idea where the recipe came from before my Granny.  I wish I knew.  But she made these all my life.  And everybody who ever ate them, LOVED them!  Every year at Christmas, she made a zillion batches.  She gave them to the preacher and his family.  She gave them to the garbage men.  She gave them to the neighbors.  She was a giver, my Granny.  She wanted to share everything she had.  She shared that love for cooking and the giving it away with me. 

So since I can’t literally give you all a batch of these, I’m sharing my Granny’s recipe with you so maybe you can make some to give to your preacher or garbage man or neighbor or whoever needs a little “happy” this Christmas season!

Chinese Chewies aren’t anything “Chinese-y” at all.  They’re pretty much a blonde brownie.  And they’re WONDERFUL!  I could sit here and eat a dozen right now!  So let’s make some!

Chinese Chewies

*  1 lb. brown sugar

*  1 tsp. vanilla

*  1 1/2 cups self-rising flour

*  1 cup pecans or walnuts

*  1 stick butter, melted

*  3 eggs, well beaten

Mix sugar, butter and vanilla together.  Add eggs and beat until well-combined.  Gradually add flour until smooth.  Add nuts.  Pour into a 9″X13″ pan that has been sprayed with non-stick cooking spray.  Bake in a pre-heated 325° oven for 25 minutes. 

If you’re giving them away, allow them to cool completely before cutting.  Cut into squares and dust with powdered sugar. 

If you’re NOT planning to give them away, cut them while they’re still warm and prepare for your eyes to roll back into your head! 

I hope you enjoy these!  My Granny would be thrilled.  Granny went home to be with Jesus 17 years ago this month.  I have this vision of her standing on the balcony of her mansion in Glory, peeping over the side and down through the clouds watching folks still enjoying “her” food.  It would make her very happy!

Merry Christmas, Granny!   And Merry Christmas to you all!

Cranberry Almond Biscotti

Deep in the recesses of your mind, do you have a very special person that comes to mind when you think of certain things?  I do!  I was a very little girl when I first learned about biscotti.  When I was a little girl, nobody around here sold biscotti.  Heck, I imagine that most didn’t have a foggy clue what it was!

My Moma was an exceptionally well-read woman.  She wanted to see and experience the world outside little ole Tennessee.  She read these magnificent books about magnificent places far, far away.  And she read about biscotti……….something that in the early 70’s wasn’t commonplace to be found in our small town.  And she wanted some!  But nowhere to find it around here.  And no fabulous internet back in those days to Google a recipe for it either!

But Moma had a cousin who lived in “the big city.”  Holden lived in Chicago.  And he had access to all kinds of unbelievably exotic things.  Or at least to a child they were exotic.  Holden got his hands on some biscotti and brought it when he came down to visit.  I can very much remember Moma freezing each piece individually so she could savor them over time. 

And that was my introduction to biscotti.  So biscotti always makes me think of Holden, my Moma’s cousin.  He was very special to me…….more like a favorite uncle than just some far-removed cousin of my mother’s.  He gave me my very first puppy, so I REALLY loved him! 

But enough of all that mushy stuff!  Let’s cook!  The recipe I’m going to share with you today is one I came across online several years ago.  I’ve since made TONS of it around the holidays!  I’ve shipped it to friends and family all over the globe!  With the bright read cranberries and the drizzle of white chocolate, it just screams “CHRISTMAS” to me!  So I thought I’d share it with all of you!

Cranberry Almond Biscotti

*  1 1/2 cups self-rising flour

*  1 1/2 cups sugar

*  1/2 cup butter, room temperature

*  2 eggs

*  1 tsp. almond extract

*  1 1/2 cups dried cranberries

*  1 tsp. orange zest (optional)

*  6 oz. white chocolate

*  1 Tbsp. shortening

*  1 small pkg. sliced almonds

Preheat oven to 350°.  Combine sugar, butter, eggs and almond extract in a bowl.  Beat with a mixer until smooth and creamy.  Slowly add flour until well combined.  Add dried cranberries and orange zest.  Divide dough in half.  Shape each half into 2 1/2″ wide, 9 1/2″ long, 1″ tall log on parchment paper lined baking sheet (or your Pampered Chef stoneware.)  Bake until brown, approximately 35 minutes.  Allow to cool COMPLETELY before proceeding to next step!  Leave the oven on.

Once logs are cooled, cut them into 1″ thick slices using a serrated knife.  Arrange them cut-side down on the baking sheet and return to the oven for 10 minutes.  Flip to the other cut side and bake an additional 5 minutes. 

Melt white chocolate and shortening in microwave for 1 1/2 minutes.  Stir until smooth.  Drizzle on the tops of each piece of biscotti.  Sprinkle with almonds while chocolate is still soft.  Allow chocolate to dry before storing biscotti.  Store in a loosely covered container.

It *sounds* hard, but it’s really not.  And the end result is insanely delicious!  These make such beautiful little hand-made gifts for the holidays!  I like to put 3-4 in those little Christmassy cellophane bags and tie them up with curly ribbon.  They look all kinds of fancy!  You’ll be the toast of all your family and friends when you give these to them!

And if you want to switch up this recipe, it’s very amenable to that!  I’ve added cocoa and swapped the dried cranberries for dried cherries.  I’ve made it with no fruit, but mini chocolate chips and then drizzled with regular chocolate instead of white.  I’ve made it with brickle and pecans in it.  It’s a pretty forgiving recipe and let’s you make it pretty much anything you want it to be. 

I hope you enjoy this one!  It’s one of my favorite holiday goodies to make!  And it’s also a favorite of folks who have received it!  Merry Christmas!

Amazing Pumpkin Cookies

***singing***  It’s beginning to look a lot like Christmas……..

OK, well maybe not quite yet here in Dixie.  But we DID have a flake or two of snow this morning!  I don’t think I ever remember seeing any snow this early ’round these parts.  And it WAS just a flurry or two.  But still…..it was snow.  So I thought I’d sing y’all a little song to rock off this fabulous Christmas season. 

So Christmas is coming in exactly 24 days.  OH MY GOSH!  Christmas is my favorite of all holidays!  Y’all should see my house.  It’s like Clark Griswold from National Lampoon’s “Christmas Vacation” or Buddy Hall from “Deck the Halls” got hold of it!  I’m fairly certain you can see my house from outer space.  hehehe  All that to say, we REALLY get into the spirit of the season at my house!  We’re lit and twinkling all over the place!

But the Christmas season isn’t complete without goodies!  Goodies must be made!  And shared!  So I thought I’d do a little take on the Food Network’s “12 Days of Cookies.”  Only I’m going to share as many as I have time to share.  MIght be 12………um, might be 2………but might just end up being 24!  Who knows!?  I’ll share as I have the time to share.

The first goodie I want to share is a Pumpkin Cookie.  Before I ate these cookies, I was a self-professed pumpkin hater.  So I encourage you to not be hatin’!  If you think you hate pumpkin, try these cookies!  I think you’ll end up being a pumpkin LOVER!  They’re absolutely amazing!  Unbelievably soft, moist and delectable! 

So let’s make some cookies!

Amazing Pumpkin Cookies

*  2 1/2 cups Self-Rising Flour

*  1 tsp. ground cinnamon

*  1/2 tsp. ground nutmeg

*  1 1/2 cups sugar

*  1 stick butter, room temperature

*  1 cup pumpkin puree (NOT pumpkin pie filling!!!)

*  1 egg

*  1 tsp. vanilla

*  Glaze (recipe follows)

Beat sugar and butter with a mixer until creamy.  Add pumpkin, egg and vanilla and beat until smooth.  Add flour and spices gradually.  Drop by spoonfuls (or use your trusty Pampered Chef small scoop!) on your cookie sheets lined with parchment paper (or on your trusty Pampered Chef baking stones!)  Bake in a preheated 350° oven for 15-18 minutes or until the outside edges are firm.  Allow to cool a few minutes before frosting with glaze.  Yield:  approximately 3 dozen cookies depending on the size you make them.

Glaze recipe:

*  2 cups confectioner sugar

*  1 tsp. vanilla or 1/2 tsp. maple flavoring

*  3 Tbsp. milk

*  1 Tbsp. melted butter

Stir until smooth.  Drizzle over cookies. 

Eat 47 of them while they’re still warm!  And fall in love with pumpkin!  I promise you will when you eat these!  They’re just unbelievable!

I would LOVE to be able to share some photos of these cookies (and various other recipes I’ve shared with you lately.)  But here’s the problem…….it would seem that some small blonde male children have absconded with and LOST my beloved camera.  Said children shall remain nameless  ***cough cough  ANKLE BITERS cough cough***  Sooooooooo………..there will be no pictures until my camera is located or until my FABULOUS new camera I just bought for myself arrives from Amazon.com!  ***MERRY CHRISTMAS TO ME*** 

So my apologies that there have been no photos for a while.  I hope that there will be photos soon and their quality will be dramatically better than previous ones!  We shall see!

At any rate, Merry Christmas season to you all!  Go bake something wonderful!  And if you have a recipe to share with ME, I would LOVE that!  I’m always on the lookout for a new and amazing recipe!  So find your best and come share! 

***singing***  It’s beginning to look a lot like Christmas……..everywhere I go………